Sunday, September 27, 2009

Mocha Cupcakes


Starbucks is getting ready to launch their new product, VIA Ready Brew Coffee all across North America, so I took it as the perfect opportunity to make some coffee-based treats.

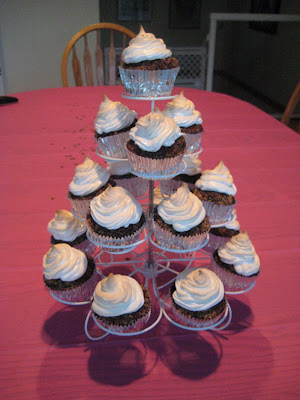
Mocha Cupcakes and Coffee Buttercream. They are really delicious, a little too much coffee flavor for my liking, so I didn't eat a whole one. But coffee lovers will love them!

Again, used my little cups, which I'm really starting to love. I saw another blog that has a step by step on how to get the cupcake out of the cup, by pulling open all the pleats and they just pop right out. Easy.

My first complaint about a MS recipe: this is not the moistest cake, and all I did to alter it was change regular espresso to Starbucks VIA. No offense Martha.

Mocha Cupcakes
Adapted From Martha Stewart Cupcakes

2 1/4 cups cake flour, sifted
2 tbsp. unsweetened cocoa powder
1/2 cup unsalted butter, room temperature
1 1/2 cups packed light-brown sugar
2 eggs, room temperature
1 tsp. pure vanilla extract
1 1/2 tsp. baking soda
1/4 tsp. salt
1/2 cup sour cream
4 packets Starbucks Italian Roast VIA Ready Brew dissolved in 3/4 cup boiling water

Preheat oven to 325 degrees.

Whisk together cake flour and cocoa. Cream butter until smooth. Add the brown sugar and eggs; beat until fluffy. Add vanilla, baking soda, and salt; beat to combine thoroughly.

Add flour mixture to wet ingredients in three batches, alternating with sour cream, and beating until just combined after each. Add coffee to batter and beat until smooth.

Divide batter evenly among regular cupcake paper-lined muffin tins, or paper cups.

Bake, rotating tins halfway through, until a cake tester inserted comes out clean, about 22 minutes. Cool completely.


Coffee Buttercream
By Dulce Doll

1 cup unsalted butter, room temperature
1/2 cup heavy cream
4 packets Starbucks Columbia VIA Ready Brew dissolved in 2 tbsp. boiling water
4 to 6 cups confectioners sugar

Cream butter and 2 cups sugar together. Add cream, coffee, and 2 more cups sugar. Keep stirring and adding sugar until you have a workable consistency.


Saturday, September 26, 2009

PB and J


Here's a new twist on a classic flavor pairing. I picked up my October Martha Stewart Living today and this recipe was the last one featured in the book.

They worked out pretty well, and I was able to use the Blackberry Jam I made and blogged about in this post. The recipe calls for raspberry jam, but mmmmm blackberry. And don't worry, it is my jam, but in an old Traverso's jam jar that I love (plus, I had more jam than I did jars at the time!).

Also, I changed the recipe a little, it calls for the jam to be added to the cookies after they're cooled, and I added it part way through baking, I like jam after it's been in the oven a bit and caramelized some.

Peanut Butter and Jelly Thumbprints

1 1/4 cups AP flour
1/2 tsp. baking powder
1/2 tsp. baking soda
1/2 tsp. salt
3/4 cup smooth peanut butter
1/2 cup unsalted butter, room temperature
1/3 cup packed light-brown sugar
1/3 cup granulated sugar, plus more for rolling
1 large egg
1 tsp. pure vanilla extract
1/2 cup raspberry jam


Preheat oven to 350 degrees. Whisk together flour, baking powder, baking soda, and salt. Beat peanut butter and butter until smooth. Add sugars and beat until light and fluffy. Add egg and vanilla, and beat until incorporated. Add dry ingredients, and mix until combined.

Scoop level tablespoons of dough and form into balls. Roll each ball in granulated sugar, and transfer to parchment-lined baking sheets, spacing about 2-inches apart.

Bake until cookies are puffy, about 10 minutes. Remove from oven, and make indentations in centers by pressing with the handle end of a wooden spoon.

Scoop a small amount of jam into each indentation and return cookies to oven and bake until edges are golden, 6 to 7 minutes more.

Transfer cookies to wire racks and cool completely.

Cookies can be stored for up to 1 week.

Makes about 40 cookies.

Friday, September 25, 2009

Like Buttuh

I made butter! Gone are the days of churning and shaking, now that we have modern appliances.

Okay, so this is totally easy. There are a few methods to making butter that I found while I was researching how I would do it. 1) in the Kitchenaid 2) by shaking it in a jar - could you imagine? and 3) in the food processor. Obviously the Kitchenaid and food processor methods are very similar.

Here's what I did:

All you need is whipping cream (I used a full liter) and about 1/2 teaspoon salt (optional). Add these ingredients to the bowl of your food processor, fitted with the chopping blade.

Start to blend and you will see the cream pass through several stages. At first, from sloshy soft whipped cream, firm whipped cream to coarse whipped cream.


Suddenly the cream will start to seize, the shape will collapse, and the whirring will change to sloshing.


The butter is now fine bits of butter in buttermilk (and it actually is buttermilk, you can save it and use it). Within a few seconds, the yellowish butter will separate from the buttermilk.


Drain very well. I pulsed it a few more times and drained it over and over, then wrapped it in cheesecloth and squeezed out as much moisture as I could.

At this point you can also 'wash' the butter, a process with ice water and further blending to help it store better. I didn't do that this time because I'm going to be using the butter quite quickly.

I portioned into 1/2-cup rations to store, wrapped in plastic wrap.

My 1 liter of whipping cream made about 2 1/2 cups of butter.

Thursday, September 24, 2009

Welcome Fall!


Fall is definitely one of my favorite seasons. There's something so special about the changing colors and gradually changing temperatures. I am fortunate that I live in a place where the summer generally hangs on and on, today was 27 degrees! However nice the days are, the nights are getting colder and the days are getting shorter. Fall is homey and comforting.

I've started to really love pumpkin, which I'm happy about, because I feel like it's one of those things that I 'should' like. Pumpkin pie, pumpkin muffins, and now even Starbucks' pumpkin spice lattes. Seriously, first year ever that I've been able to drink one. However, maybe that's a bad thing, because now I can't stop drinking them!

I've adapted this recipe from two different ones that I've been looking at, trying to get the taste just the way I like it. I've been playing with spice combinations so they would taste like pumpkin pie, by using, you guessed it, pumpkin pie spice. A favorite spice combination of mine, that I don't get to use nearly enough. The cookie is light and fluffy, with almost a cake-like texture. And they are BIG and FAT!

With pumpkin as the base for the wet ingredients, I don't think they're too bad as far as calories. Maybe I'll have an easier time justifying these than the lattes.

Pumpkin Spice Cookies
By Dulce Doll

2 cups AP flour
1 1/2 tsp. baking powder
1/2 tsp. salt
1 1/2 tsp. pumpkin pie spice
1/2 tsp. powdered ginger
1/2 tsp. ground cinnamon
2 eggs
1 cup sugar
1/2 cup canola oil
1 cup pumpkin puree
1 tsp. vanilla extract
5 oz. bittersweet chocolate, chopped roughly

Preheat oven to 325 degrees. Line two baking sheets with parchment and set aside.

In a medium bowl, combine flour, baking powder, salt, pumpkin pie spice, ginger, and cinnamon. Whisk to blend.

In a large bowl, beat the eggs and sugar until smooth. Add the oil, pumpkin, and vanilla, beating well between each addition.

Add flour to wet ingredients in batches, mixing well to incorporate after each addition. Mix in the chocolate chunks.


Using a 1/4-cup measuring spoon, drop spoonfuls of dough onto prepared baking sheets. Bake until cookie tops feel firm and a toothpick inserted comes out clean, about 20 minutes.

Remove cookies to a wire rack to cool completely.

Wednesday, September 23, 2009

My First Facebook Giveaway!

At a friend's urging, I started a Facebook group to share recipes and tips and I'm nearing a hundred members, so I challenged my group to raise it to two hundred, with a reward of a draw for Martha Stewart's Cupcakes. I don't think it's going to take long to get there!

The group is called Bakealicious! and it's really starting to take off. It's an open group and anyone can join, so please feel free to do so - and maybe you'll win a great book!

Tuesday, September 22, 2009

Banana (Nut Optional) Muffins


Less fat but not less flavor. I am sooooo glad I found this recipe! Super moist and really just taste like fresh bananas. The recipe calls for nuts, but, since I'm not the biggest fan of nuts in my baked stuff, I omitted them like I usually do, maybe one day...

This recipe has oats in it and they're great because they add a little crunch, and it calls for AP flour, which I regret using because duh, I always use whole wheat flour when I make banana bread, so why would this be any different? It would have made them just a little bit better.

Healthy Banana Nut Muffins

Ingredients:

1 1/2 cups AP flour
1/2 cup sugar
1/4 cup rolled oats
2 tsp. baking powder
1/2 tsp. salt
3 very ripe bananas, mashed
1 moderately ripe banana, sliced
1/2 cup milk
1 large egg
2 tbsp. vegetable oil
2 tsp. lemon juice
1 1/2 cups walnuts, chopped

Directions:

Preheat oven to 400 degrees. Lightly grease muffin tins with vegetable oil.

Combine flour, sugar, oats, baking powder, and salt in a medium bowl, whisk gently to combine.

Place mashed bananas in a large bowl. Stir in milk, egg, oil, and lemon juice. Mix in dry ingredients and walnuts. Mix until dry ingredients are just incorporated. Avoid over-mixing.

Scoop batter into muffin tins evenly (I used 1/4-cup measuring scoop and it was perfect). Place sliced bananas 2 to 3 pieces on top of each muffin batter. Bake muffins until golden brown and toothpick inserted into center comes out clean or about 20 minutes.

Makes exactly 12 regular sized muffins.

My First Contest!


I just entered a photo into the September "Does My Blog Look Good In This?" food photography event. I saw it on the second to last day that I could enter, and on a whim, thought, WHATEVER! and went for it. I have zero photography training and even less kitchen training.

Here's the pic I used:


It had to be from a blog entry in August, and I thought it was kind of a cool photo. I'm not sure what the prize is for winning, or if there even is one, maybe it's just the glory.....

Here's the link if you want to check out the competition (and there are some really beautiful photos check out the Chocolate Dobos Torte - OMG!):


Send good luck my way!

Monday, September 21, 2009

As For My Jealousy...

There's one more you should look at:

http://freshlocalandbest.blogspot.com/

I check this blog daily, if not for the beautiful photographs, then for the hope that she will have posted more stories of my favorite, most fabulous, New York City. I will be eternally jealous of this blogger for where she gets to live - and I haven't even been there yet! My trip is booked for June and I will soon be counting down the sleeps!

Just Found This

I just found the best blog! No offense to any of the others I'm following...

She's a pastry chef (which, of course, is my dream), and she's got gorgeous photos and mouth watering recipes, but breaks them down in a way that looks sooooo simple!

Please take some time and add this to your favorites list too!

Sunday, September 20, 2009

For the Love of Lemon


I don't think I could say this enough. I love luv lurve lemon! Making good on my goals to a) use my Martha Stewart Cookies book and b) start picking away at my list of 50 recipes I want to try (see the right column down the side of my blog for the complete list).

So technically, these are bars in the cook book, but I decided to make it in my flan pan with the removable bottom to make it prettier. Did I mention I love lemon? This recipe was extremely simple and again, like so many of Martha's recipes, I already had everything in my kitchen.

Here's the recipe as it is printed, I did everything the same, but of course, used a different pan.

Lemon Squares

For the Crust:
3/4 cup (1 1/2 sticks) unsalted butter, frozen, plus more for dish
1 3/4 cups AP flour
3/4 cup confectioners' sugar
3/4 tsp. coarse salt

For the Filling:
4 large eggs, lightly beaten
1 1/3 cups granulated sugar
3 tbsp. AP flour
1/4 tsp. coarse salt
3/4 cup fresh lemon juice
1/4 cup whole milk
Confectioners' sugar, for dusting

Directions:

Preheat oven to 350 degrees. Butter a 9 by 13-inch glass baking dish, and line with parchment paper.

Make crust: Grate butter on a cheese grater with large holes; set aside. Whisk together flour, confectioners' sugar, and salt in a large bowl. Add butter, and stir with a wooden spoon until combined and mixture looks crumbly.


Transfer mixture to prepared dish; press evenly onto bottom with your hands.

You can see the butter speckled throughout, mixture begins quite dry and
comes together during baking.

Freeze crust 15 minutes. Bake until lightly golden, 16 to 18 minutes. Leave oven on.

Meanwhile, make the filling: Whisk together eggs, granulated sugar, flour, and salt in a bowl until smooth.

Can you tell the difference? See *note below.

Stir in lemon juice and milk. Pour over hot crust.

Reduce oven temperature to 325 degrees, and bake until filling is set and edges are slightly golden brown, about 18 minutes. Let cool slightly on a wire rack. Lift out; let cool completely on a wire rack before cutting into 2-inch squares. Dust with confectioners' sugar.

Lemon squares can be refrigerated in airtight containers up to 2 days.

Makes about 2 dozen (or one tart!).


* Note: The store was out of organic free range eggs and I had to buy free run instead. Three of these eggs are organic free range and one is free run. The only way to be sure that the birds are being ethically treated and living a normal life of exercise and socializing, free of hormones, which are harmful not only to the animal, but to us as consumers as well, is if the eggs are certified organic free range.

On Order


Very much looking forward to this book! I have it pre-ordered, it's available November 15, and is claiming to be a beginner's guide to making macaron at home. My macaron hiatus will continue until then. Unless I cave and I need the chocolate ones again.

Saturday, September 19, 2009

Poodles for the Poodle


I've been doing a lot of baking lately, but all for humans, so I decided today I would bake some for my little one and his friends.

It's obviously very important that you use the very best ingredients possible. Extra virgin olive oil, peanut butter free of salt, sugar or any other preservatives (the only ingredient should be peanuts), etc.

Use fun cookie cutters if you have them. Most of the ones I've seen are bone-shaped, but I happen to have a poodle cutter that I picked up at Sur la Table.


Peanut Butter Dog Treats

Ingredients:

1 1/4 cup rolled oats
1 3/4 cups whole wheat flour
2 tbsp. olive oil
1 cup water
1/3 cup peanut butter

Directions:

In a large bowl, mix all ingredients together until well-blended. It will seem very dry. Cover and refrigerate for at least 30 minutes.

Preheat oven to 300 degrees. Working with half the dough at a time, knead until smooth on a floured board, and roll to 1/8-inch thick. The thinner the dough, the crispier the cookie.

Cut into desired shapes, and bake for 20 to 25 minutes, until crisp. Cool, and store in an airtight container.


Happiness really is a warm puppy.

Almond Biscotti


I had heard over and over how simple biscotti is to make. I am totally in agreement since I started making it. This is the recipe that I've made many times, it's easy and delicious, and you are likely to have most of the ingredient in you kitchen right now. It comes from MS Everyday Foods.

The recipe calls for crystallized ginger and sprinkling the top of the biscotti with sugar, both of which I omitted. Also, I always make them wider than 3 inches, more like 5 inches, more like a biscotti you would get in a coffee shop.

Biscotti are interesting and durable, easy to package. They're a great gift as they are, and even better if you dip an end in melted semisweet chocolate.

Ingredients:

2 cups Ap flour, plus more for dusting
3/4 cup sugar, plus 1 tsp. for dusting
2 tsp. baking powder
2 tbsp. grated lemon zest (about 2 lemons)
1/4 cup chopped crystallized ginger (optional)
3 large eggs
2 tsp. vanilla extract

Directions:

Preheat oven to 350 degrees. In a large mixing bowl, whisk together flour, 3/4 cup sugar, baking powder, lemon zest, and salt. Stir in almonds and ginger.

In a small bowl, whisk together eggs and vanilla; stir into flour mixture. (Dough will appear very dry but will come together when kneaded.)

Transfer dough to a lightly floured surface; knead until smooth. Divide dough in half; shape into two logs, each about 1 inch high and 3 inches wide. Place on a parchment lined baking sheet; sprinkle with remaining sugar.

Bake until logs are puffed and outside is firm (the tops may crack), about 30 minutes. Transfer to a wire rack and cool completely, about 2 hours.

Using a serrated knife, thinly slice the logs crosswise, 1/4 inch thick. Lay slices on two parchment-lined baking sheets. Bake until crisp and lightly golden, rotating pans and turning biscotti over halfway through, 20 minutes total. Cool completely before serving or storing.

Chocolate Graham Cracker Cupcakes with Toasted Marshmallow


These were challenging and fun. I think that the next time I try them I will have more success. I made them last spring for a Sex and the City movie party (hence the hot pink table covering and gold star confetti), for friends and they were a huge hit. They were delicious and not too sweet.

I first saw them on Martha Stewart's show when Jennifer Shea, the owner of Trophy Cupcakes in Seattle (see this post). Then, my parents stopped there and picked some up and they were amazing. I found the recipe on the MS website and decided to give it a shot.

The cake was extremely easy to make, I've made it since for other cupcakes, but substituted the boiling water for coffee and it was awesome.

Before I attempt them again I will own a butane kitchen torch so I can do a better job of browning them. This time I put them under the broiler and watched them very carefully. And also, I think if the egg whites for the frosting were room temperature, and I had whipped the topping until it was a bit thicker it may have piped better.

Here's Trophy Cupcakes' cupcake (obviously put mine to shame):


Cupcake Ingredients:

2 1/4 cups plus 2 tbsp. sugar
1 3/4 cups AP flour
3/4 cup plus 1 tbsp. cocoa powder
1 1/2 tsp. baking powder
1 1/2 tsp. baking soda
1 tsp. salt
2 large eggs
1 cup whole milk
1/2 cup vegetable oil
2 tsp. pure vanilla extract
1 cup boiling water
1 1/2 cups graham cracker crumbs (from about 20 squares)
1/3 cup unsalted butter, melted
9 oz. bittersweet chocolate, finely chopped
Marshmallow Frosting

Directions:

Preheat oven to 350 degrees. Line 2 standard muffin tins with cupcake liners; set aside.

Sift 2 cups plus 2 tbsp. sugar, flour, cocoa powder, baking powder, baking soda, and salt into the bowl of an electric mixer. Using the paddle attachment, mix ingredients together on low speed.

In a large bowl, mix together eggs, milk, oil, and vanilla. Add flour mixture and beat on medium speed for 30 seconds. Scrape down sides of bowl and continue mixing on medium speed for 2 minutes. Add boiling water and stir to combine; set cake batter aside.

Place graham cracker crumbs, remaining 1/4 cup sugar, and melted butter in a large bowl; stir until well combined.

Place 1 tbsp. graham cracker mixture into the bottom of each prepared muffin cup. Use the bottom of a small glass to pack crumbs into the bottom of each cup liner. Reserve remaining graham cracker mixture for topping.

Place 2 tsp. chocolate in each muffin cup. Transfer muffin tins to oven and bake until edges of the graham cracker mixture is golden, about 5 minutes. Remove from oven and fill each cup 3/4-full with cake batter. Sprinkle each with remaining chocolate and graham cracker mixture. Return to oven and bake, rotating pans halfway through baking, until tops are firm and a cake tester inserted in the center comes out clean, 18 to 20 minutes. Transfer muffin tins to a wire rack and let cupcakes cool in pan for 10 minutes. Remove cupcakes from pan and let cool completely.

Transfer frosting to a large pastry bag fitted with a large plain round or French tip (such as Ateco #867 or Ateco #809). Pipe frosting in a spiral motion on each cupcake.

Transfer cupcakes to a baking sheet. Using a kitchen torch, lightly brown the frosting, taking care not to burn the cupcake liners. Serve immediately or store in an airtight container, up to 2 days.

Marshmallow Frosting Ingredients:

8 large egg whites
2 cups sugar
1/2 tsp. cream of tartar
2 tsp. pure vanilla extract

Directions:

Place egg whites, sugar, and cream of tartar in the heatproof bowl of an electric mixer. Set over a saucepan with simmering water. Whisk constantly until sugar is dissolved and egg whites are warm to the touch, about 3 to 4 minutes.

Transfer bowl to electric mixer fitted with the whisk attachment and beat, starting on low speed, gradually increasing to high, until stiff, glossy peaks form, 5 to 7 minutes. Add vanilla, and mix until combined. Use immediately.

Makes 24 cupcakes.

Unprofessional!

NYTimes Blueberry Muffins


These muffins were fantastic. Moist and delish and big! These would be great if you had an over-sized muffin tin because of the way that they rose and came up over the edges.

The recipe is different that any others I've used because part of the blueberries are crushed and part are whole, creating a super moist result.

I got the recipe from this article in the New York Times, be sure to check it out as well.

Ingredients:

1/2 cup butter, room temperature
1 1/4 cups sugar, plus more for topping
2 eggs
2 cups AP flour
1/2 tsp. salt
2 tsp. baking powder
1/2 cup milk
2 cups blueberries, washed and picked over

Directions:

Preheat oven to 375 degrees.

Cream the butter and 1 1/4 cups sugar until light and fluffy. Add the eggs, one at a time, beating well after each addition.

Sift together the flour, salt and baking powder, and add to the creamed mixture alternately with the milk.

Crush 1/2 cup blueberries with a fork, and mix into the batter. Fold in the remaining whole berries.

Grease 12 large muffin cups, and fill with batter. Sprinkle the tops with more sugar, and bake for 30 minutes.

Cool for 30 minutes before removing from tin. Store, uncovered, or the muffins will be too mushy.

Makes exactly 12 muffins.